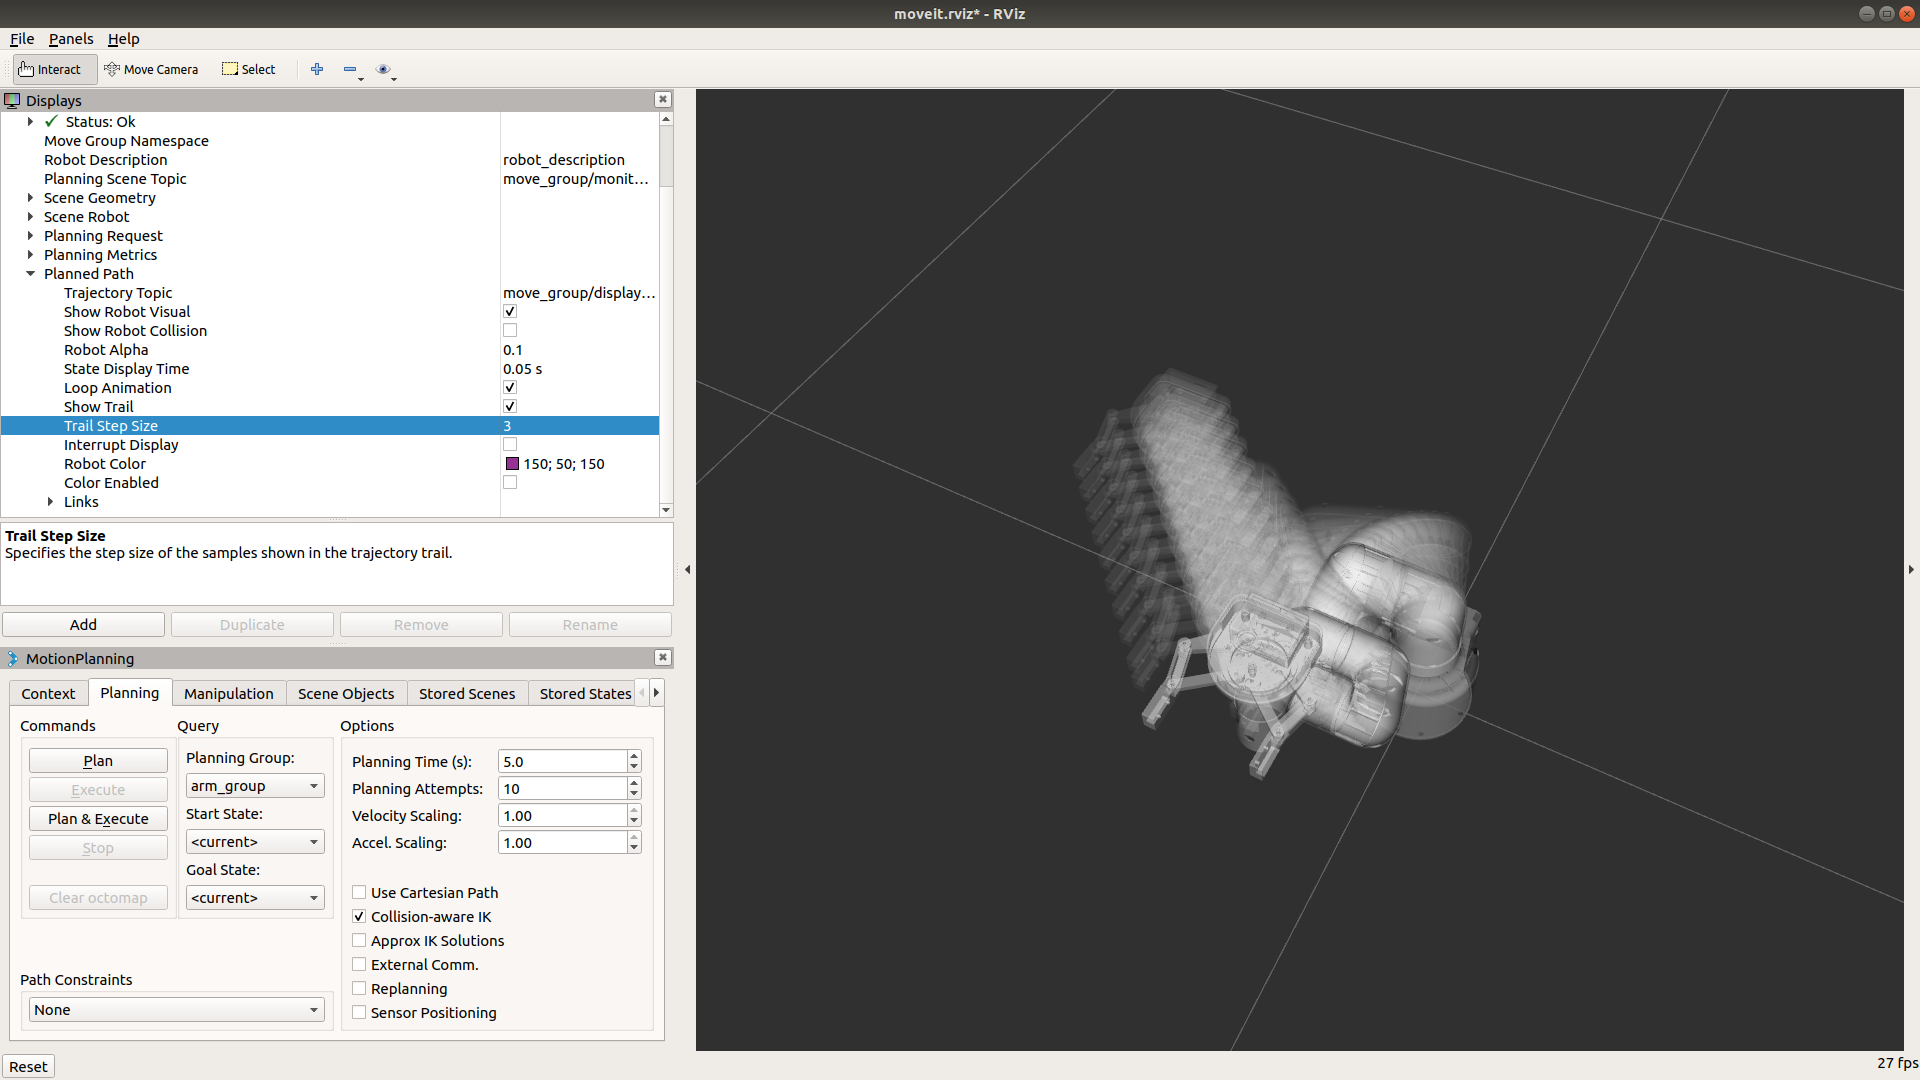
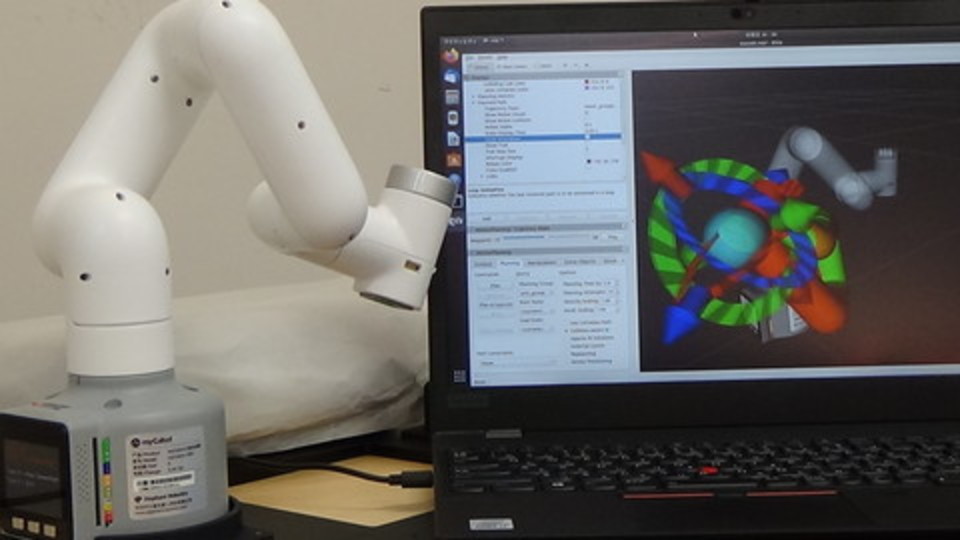
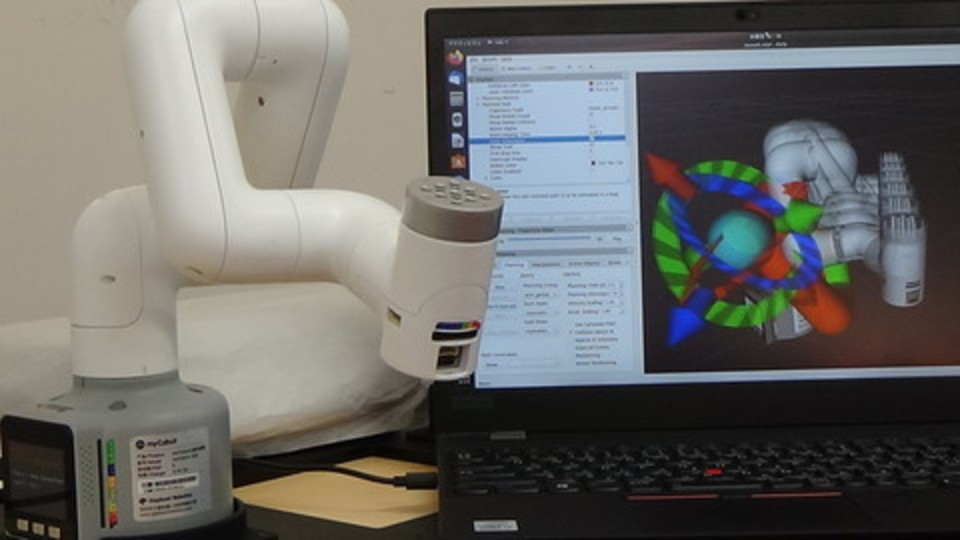
MoveIt!プログラミングの基礎
物理シミュレータと MoveIt! を使って プログラムからロボットを操作します.
1. プログラムを入力して実行する
1行もしくは数行ごとにプログラムを入力して実行し, 各コマンドで何をしているのかを見てみます.
1.1. myCobot の場合
1.1.1. 起動
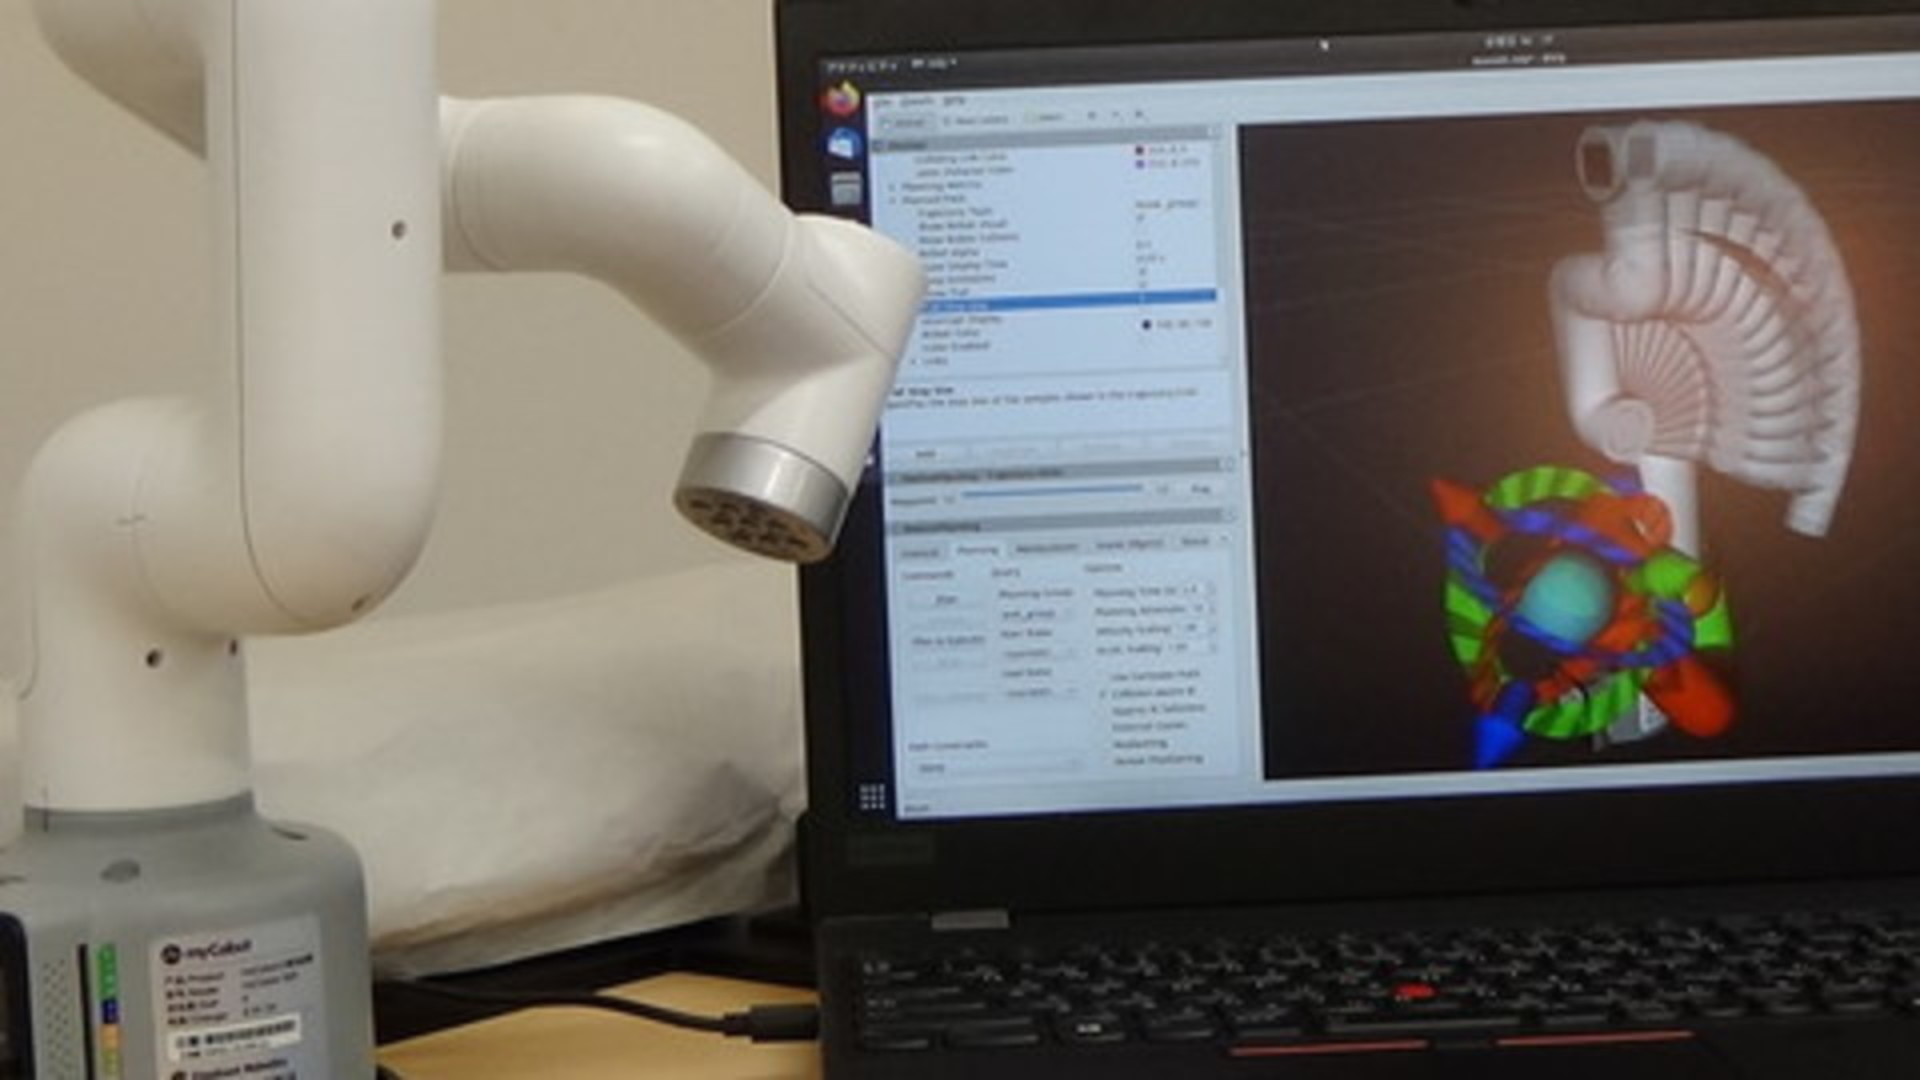
先に「実機の使い方 - myCobot の場合」を参照してください.
そのあと,上に書かれたコマンドの代わりに, 以下を実行してください.
ターミナル-1 : myCobot 280 とパソコンの接続プログラムの起動
この操作は、実機を動かす場合のみ必要になります。 あらかじめ 実機の使い方 - myCobot の場合 にて、myCobot のデバイスファイル名を確認します。 myCobotのデバイス名が /dev/ttyUSB0 以外の場合 (例: /dev/ttyUSB1や/dev/ACM0等) の場合は、launch ファイルを書き換える必要があります。
$ gedit ~/catkin_ws/src/tork_moveit_tutorial/launch/mycobot_interface.launch
として、エディタでlaunchファイルを編集します。
<launch>
  <arg name="port" default="/dev/ttyUSB0" doc="the serial port for connection" />
  : 略
default=”/dev/ttyUSB0” の /dev/ttyUSB0 を /dev/ttyACM0 など、実際のデバイスファイル名に変更します。
以下のコマンドを入力して、myCobot のドライバノードを起動します。
$ source ~/catkin_ws/devel/setup.bash
$ roslaunch tork_moveit_tutorial mycobot_interface.launch
ターミナル-2 : myCobot 280 用の MoveIt! の起動
$ source ~/catkin_ws/devel/setup.bash
$ roslaunch tork_moveit_tutorial demo.launch mode:=real
ターミナル-3 : 対話的プログラミングのコンソールの起動
$ source ~/catkin_ws/devel/setup.bash
$ rosrun tork_moveit_tutorial demo.py
1.1.2. 特定の関節を動かす
プログラムから関節を動かすなどをするために「右腕」の group を作成します.
次の In[1]: 以下につづくプログラムを入力して [Enter/Return] キーを押して
1行ずつ実行してください.
- 補足 :
In [1]:の[ ]の中の数字はプログラム入力するたびに更新されます.本チュートリアルにある入力例にある数字と一致しない場合がありますがそれは問題ありませんので,そのままチュートリアルを進めてください.
In [1]: group = MoveGroupCommander("arm_group")
[ INFO] [1511506815.441893962, 135.795000000]: TrajectoryExecution will use new action capability.
[ INFO] [1511506815.442105792, 135.795000000]: Ready to take MoveGroup commands for group right_arm.

In [2]:
- 注意:以下のように
TrajectoryExecution will use old action capability.と表示される場合も有りますが問題ありません.In [1]: group = MoveGroupCommander("arm_group") [ INFO] [1511506815.441893962, 135.795000000]: TrajectoryExecution will use old action capability. [ INFO] [1511506815.442105792, 135.795000000]: Ready to take MoveGroup commands for group right_arm.
グループ group に含まれる関節の名前を get_joints() で調べます.
In [2]: group.get_joints()
Out[2]:
['joint1', 'joint2', 'joint3', 'joint4', 'joint5', 'joint6']

In [3]:
上は myCobot 280 の場合の出力結果で
joint1〜joint6 の6つの関節があることがわかります.
肘関節に相当する joint3 を動かしてみます.
set_joint_value_target() を使って関節の目標値を設定します.
set_joint_value_target() に関節名 'joint3' と
関節角度を -2.0(単位ラジアン[rad])を渡します.
In [3]: group.set_joint_value_target( 'joint3', -2.0 )
関節角度目標を設定したので go() で動かします.
In [4]: group.go()
Out[4]: True
正常に動作が完了すると True が返ってきます.
肘関節 joint3 が少し屈曲したと思います.
同じ要領で他の右腕の関節もそれぞれ動かしてみます.
In [5]: group.set_joint_value_target( 'joint4', -0.78 )
In [6]: group.go()
Out[6]: True
In [7]: group.set_joint_value_target( 'joint5', 0.78 )
In [8]: group.go()
Out[8]: True
In [9]: group.set_joint_value_target( 'joint6', 0.78 )
In [10]: group.go()
Out[10]: True
1.1.3. 腕全体の関節を動かす
set_joint_value_target() は1つの関節だけでなく
腕全体の関節角度目標値のリストを渡すことで複数の関節を同時に動かすこともできます.
group.get_joints() で調べたように myCobot には6つの関節があるので
6つ分の関節角度目標値 [rad] を持ったリストを set_joint_value_target() に渡します.
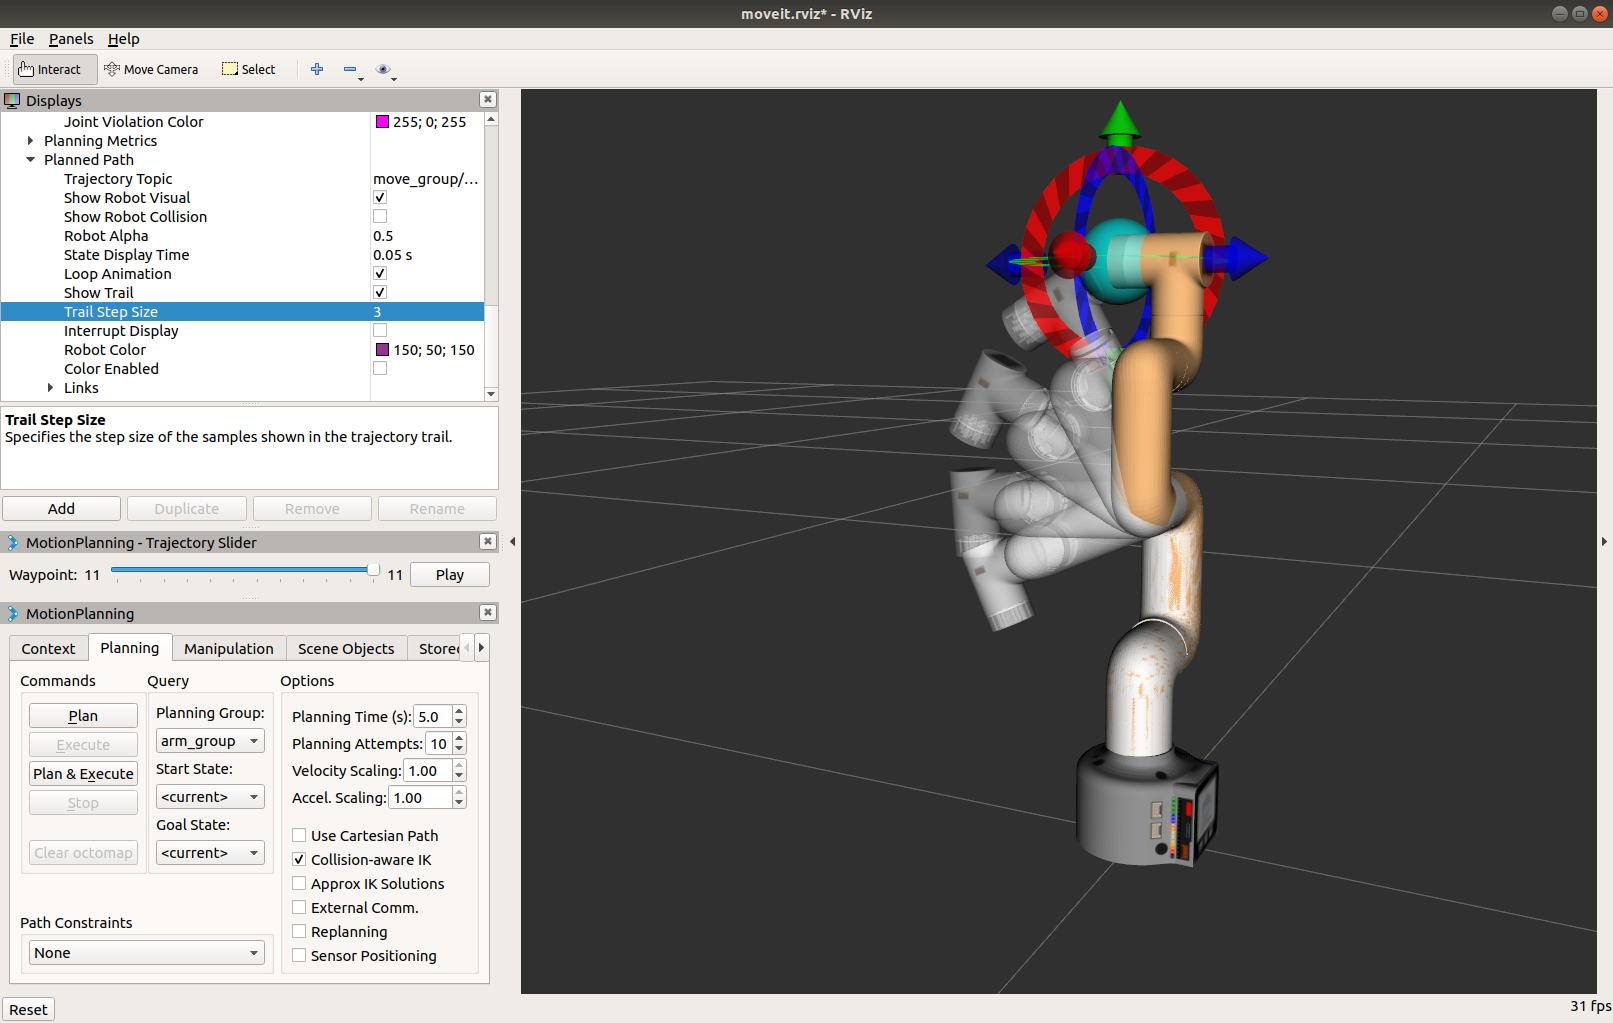
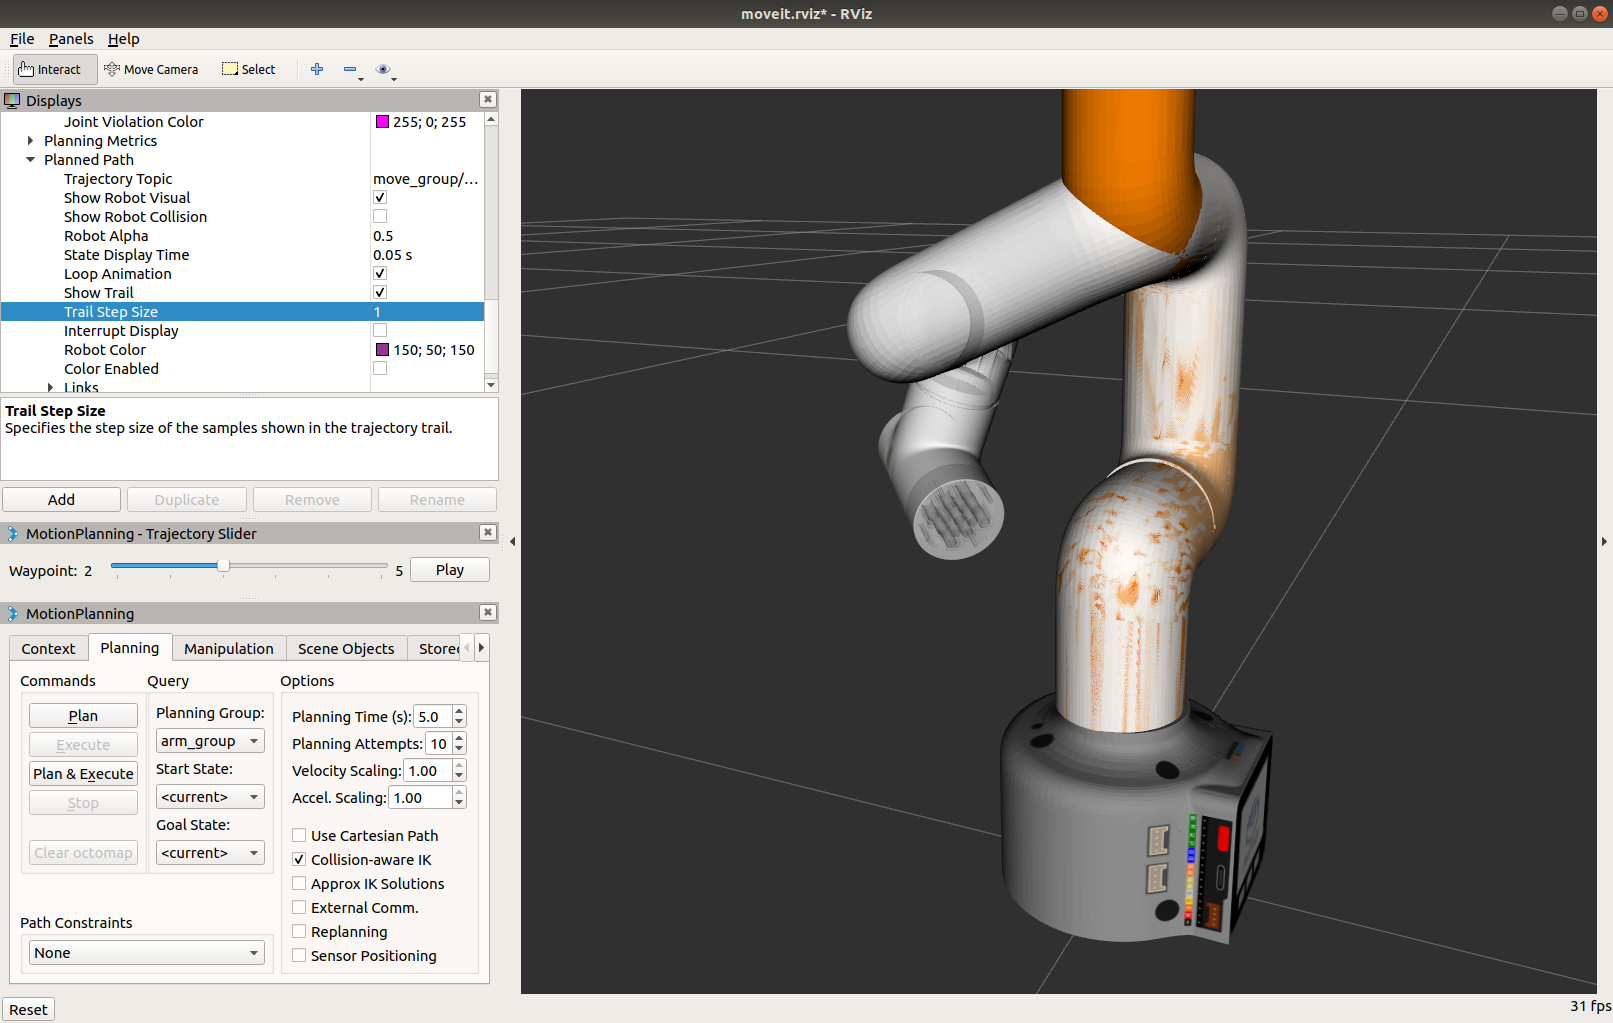
In [11]: group.set_joint_value_target( [ 0.0, 0.0, 0, 0.0, 0.0, 0.0 ] )
In [12]: group.go()
Out[12]: True
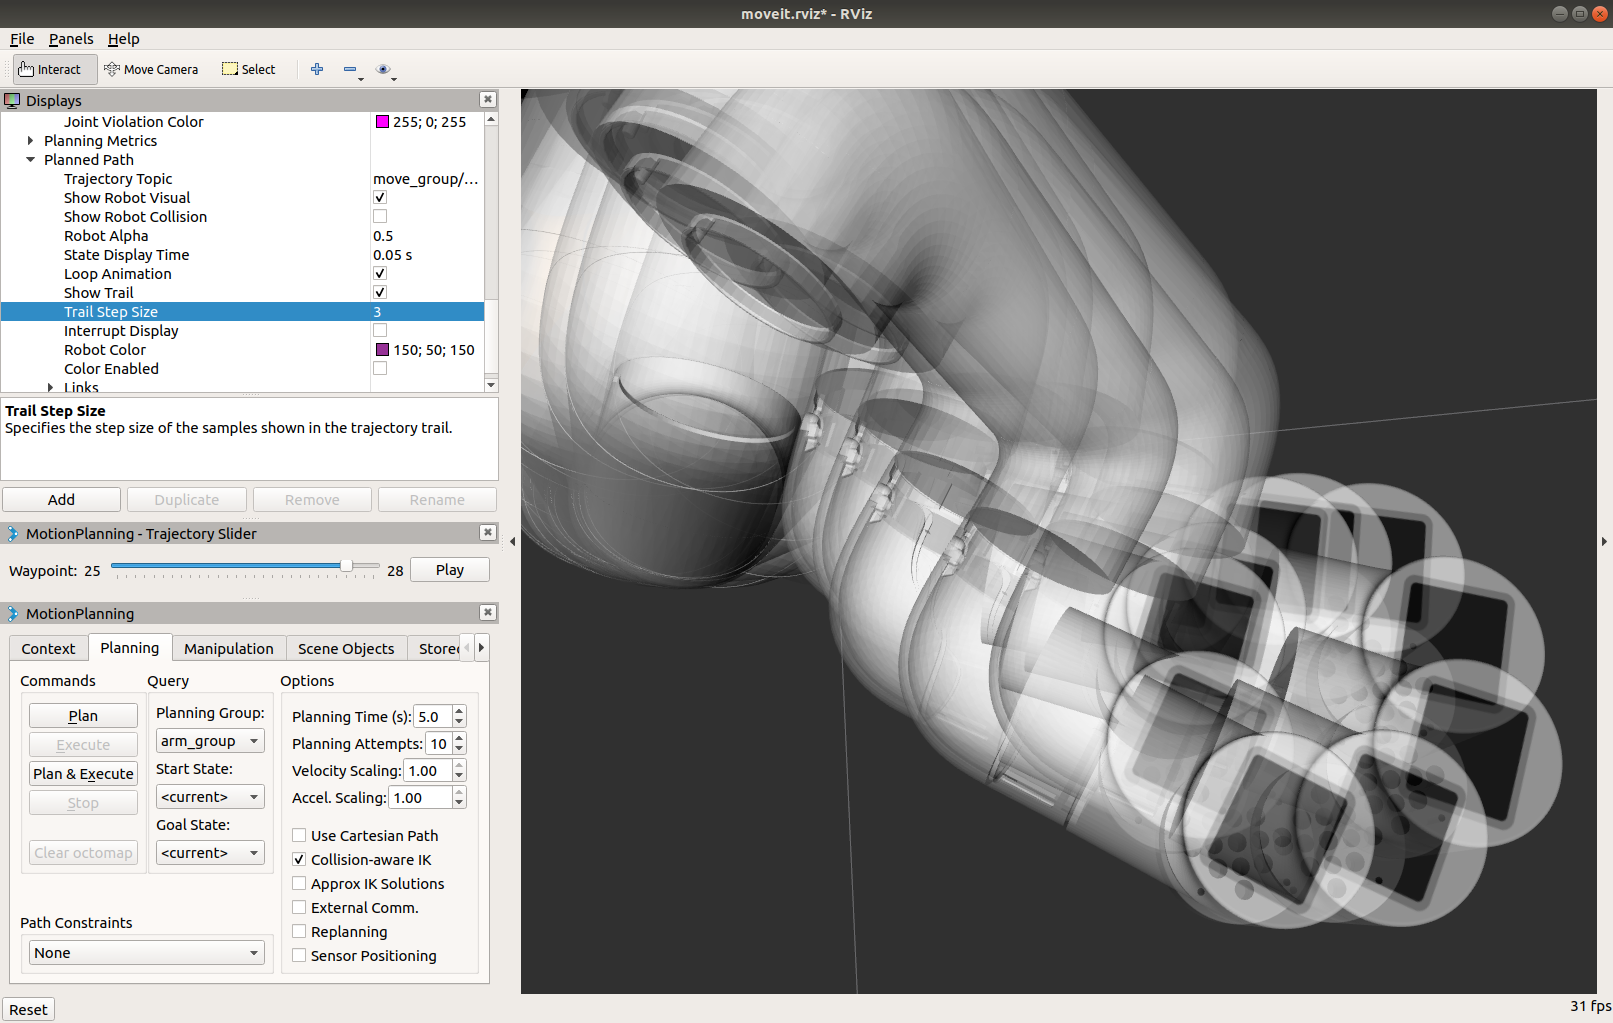
![myCobot - result of group.set_joint_value_target( [ 0.0, 0.0, 0, 0.0, 0.0, 0.0 ] )](/moveit_tutorial/program_basic/figs/3.1_In_%5B11%5D_set_joint_value_target.png)
myCobot ロボットは初期姿勢に戻っていることと思います.
1.1.4. 手先の位置を指定して動かす
手先(エンドエフェクタリンク)の位置を指定して腕を動かしてみます.
set_position_target() を使います.
手先の目標位置の座標 ( x, y, z ) をリスト [ X, Y, Z ] で
set_position_target() に渡します.
位置座標の単位はメートル [m] です.
座標原点は myCobot の場合,ベースリンク (/base) にあります.
各軸の方向は下記の右手座標系です.
- X方向 : 正 = 前 / 負 = 後
- Y方向 : 正 = 左 / 負 = 右
- Z方向 : 正 = 上 / 負 = 下
In [21]: group.set_position_target( [ 0.1, -0.1, 0.1 ] )
go() を使って実行します.
In [22]: group.go()
Out[22]: True
手先の「位置」しか指定していないので 手先の「姿勢」は思わぬ方を向いていることもあります.
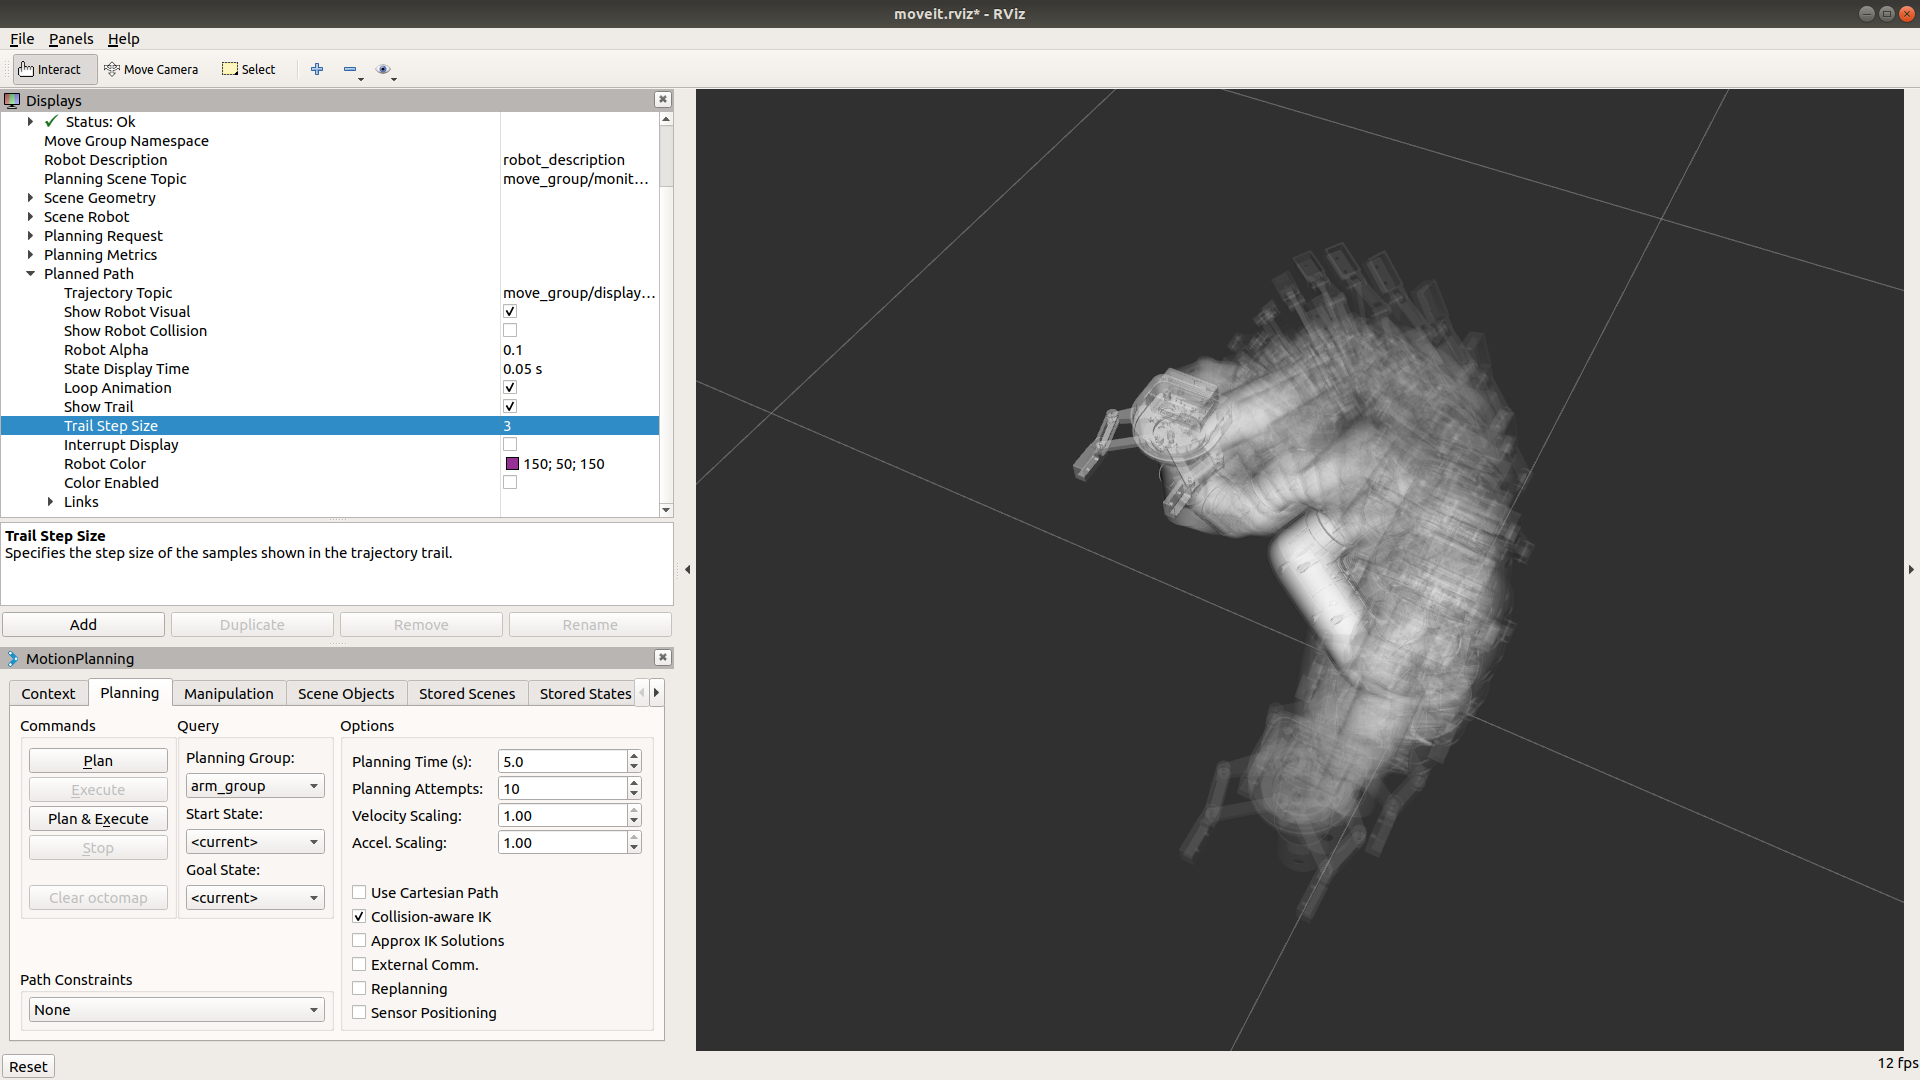
![myCobot - one result of group.set_position_target( [ 0.1, -0.1, 0.1 ] )](/moveit_tutorial/program_basic/figs/3.1_In_%5B21%5D_set_position_target.png)
1.1.5. 手先の姿勢を指定して動かす
手先の姿勢を指定してロボットを動かしてみます.
set_rpy_target() を使います.
手先の目標姿勢の角度 ( roll, pitch, yaw ) をリスト [ R, P, Y ] で
set_rpy_target() に渡します.
In [31]: group.set_rpy_target( [ 0.0, -2.36, 0.0 ] )
go() を使って実行します.
In [32]: group.go()
Out[32]: True
手先の「姿勢」しか指定していないので 手先の「位置」は思わぬところにあることもあります.
![myCobot - one result of group.set_rpy_target( [ 0.0, -2.36, 0.0 ] )](/moveit_tutorial/program_basic/figs/3.1_In_%5B31%5D_set_rpy_target.png)
- 注意:以下のようなエラーメッセージが表示された場合は,再度
group.go()をお送りください.
[ INFO] [1515668193.145149146, 166.319999999]: ABORTED: Solution found but controller failed during execution
1.1.6. 手先の位置と姿勢を指定して動かす
手先の位置と姿勢を同時に指定して腕を動かすことができます.
set_pose_target() を使います.
次のいずれか1つを set_pose_target() に渡して手先の位置と姿勢を指定します.
- 位置座標と Roll/Pitch/Yaw 姿勢角の6つの数値のリスト
[x, y, z, rot_x, rot_y, rot_z] - 位置座標とクォータニオンの7つの数値のリスト
[x, y, z, qx, qy, qz, qw] Pose型PoseStamped型
どれを渡しても set_pose_target() 内で判断して適切な処理がなされます.
- 参考 : GitHub - move_group.py 内の
set_pose_target()の定義
[https://github.com/ros-planning/moveit/blob/1.0.2/moveit_commander/src/moveit_commander/move_group.py#L252][6cf69e4b]
[6cf69e4b]b]: https://github.com/ros-planning/moveit/blob/1.0.2/moveit_commander/src/moveit_commander/move_group.py#L252 “set_pose_target()”
それでは右手先の位置と姿勢を指定して腕を動かしてみます.
まずは 位置とRPY角 を set_pose_target() に渡して動作させます.
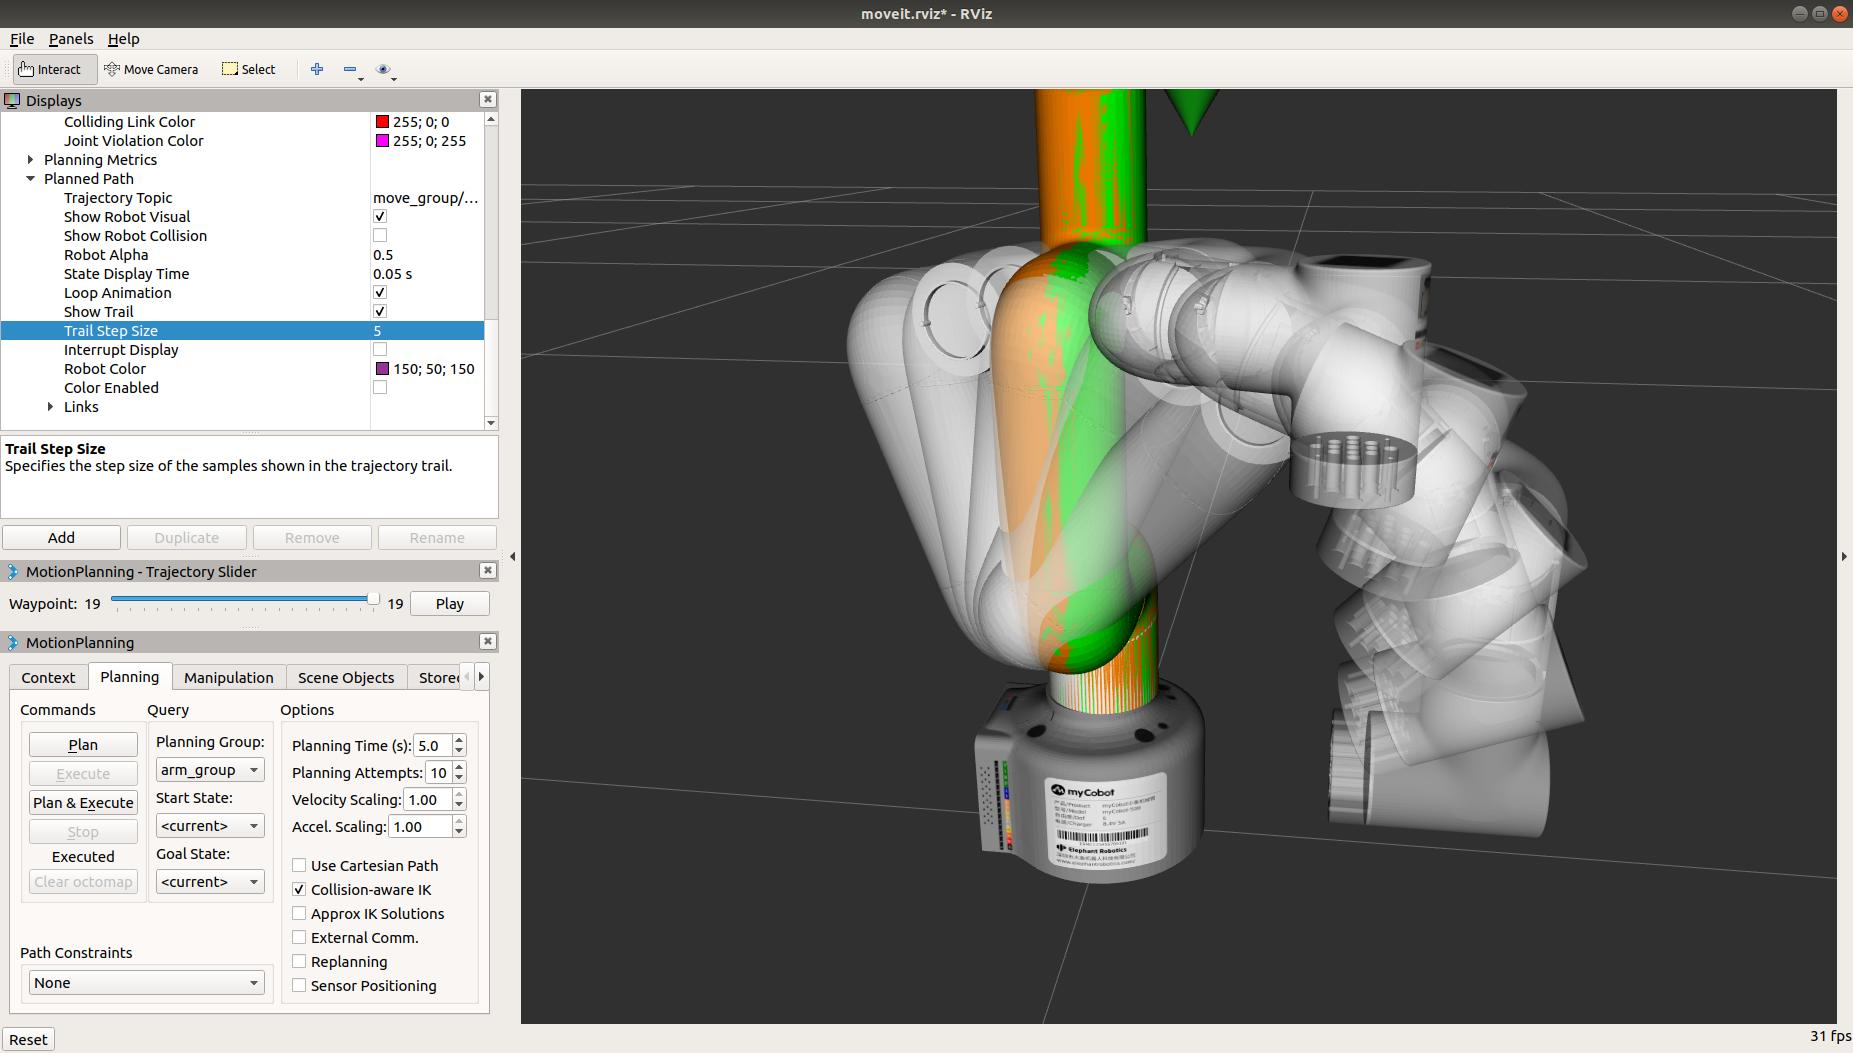
In [41]: group.set_pose_target( [ 0.1, -0.1, 0.1, 0, -1.57, 0 ] )
In [42]: group.go()
Out[42]: True
![myCobot - result of group.set_pose_target( [ 0.1, -0.1, 0.1, 0, -1.57, 0 ] )](/moveit_tutorial/program_basic/figs/3.1_In_%5B41%5D_set_pose_target.png)
もう1つ位置・姿勢を指定して腕を動かしてみます.
In [43]: group.set_pose_target( [ 0.1, -0.1, 0.2, 0, -3.14, 0 ] )
In [44]: group.go()
Out[44]: True
![myCobot - result of group.set_pose_target( [ 0.1, -0.1, 0.2, 0, -3.14, 0 ] )](/moveit_tutorial/program_basic/figs/3.1_In_%5B43%5D_set_pose_target.png)
今度は 位置とクォータニオン を set_pose_target() に渡して腕を動かしてみます.
In [45]: group.set_pose_target( [ 0.1, -0.1, 0.1, 0.0, -0.707, 0.0, 0.707 ] )
In [46]: group.go()
Out[46]: True
![myCobot - result of group.set_pose_target( [ 0.1, -0.1, 0.1, 0.0, -0.707, 0.0, 0.707 ] )](/moveit_tutorial/program_basic/figs/3.1_In_%5B45%5D_set_pose_target.png)
In [47]: group.set_pose_target( [ 0.1, -0.1, 0.2, 0.0, -1.0, 0.0, 0.0] )
In [48]: group.go()
Out[48]: True
![myCobot - result of group.set_pose_target( [ 0.1, -0.1, 0.2, 0.0, -1.0, 0.0, 0.0] )](/moveit_tutorial/program_basic/figs/3.1_In_%5B47%5D_set_pose_target.png)
- クォータニオン(四元数/しげんすう)
- 空間上の姿勢を表現するための4つの成分をもつベクトル
- 複素数から拡張された数体系
- 回転の結合・補間の計算が容易
- Roll/Pitch/Yaw のオイラー角により姿勢を表現した場合と比べて
- 長所
- ジンバルロックという特異点がない
- 計算が速い
- 短所
- 直感的に分かりにくい
- 比較的理解しやすい Roll/Pitch/Yaw からクォータニオンに変換することも可能
- 3D Rotation Converter
- https://www.andre-gaschler.com/rotationconverter/
- ROS Wiki - Quaternion Basics
- http://wiki.ros.org/tf2/Tutorials/Quaternions
- ロボット以外では航空宇宙や 3D グラフィックスなどの分野で用いられる
更に Pose 型を set_pose_target() に渡して腕を動かしてみます.
In [49]: pose_target_1 = Pose()

In [50]: print( pose_target_1 )
position:
  x: 0.0
  y: 0.0
  z: 0.0
orientation:
  x: 0.0
  y: 0.0
  z: 0.0
  w: 0.0

In [51]: pose_target_1.position.x = 0.1
In [52]: pose_target_1.position.y = -0.1
In [53]: pose_target_1.position.z = 0.1
In [54]: pose_target_1.orientation.x = 0.0
In [55]: pose_target_1.orientation.y = -0.707
In [56]: pose_target_1.orientation.z = 0.0
In [57]: pose_target_1.orientation.w = 0.707

In [58]: print( pose_target_1 )
position:
  x: 0.1
  y: -0.1
  z: 0.1
orientation:
  x: 0.0
  y: -0.707
  z: 0.0
  w: 0.707

In [59]: group.set_pose_target( pose_target_1 )
In [60]: group.go()
Out[60]: True

ポーズをもう1つ指定して腕を動かします.
In [61]: pose_target_2 = Pose()

In [62]: print( pose_target_2 )
position:
  x: 0.0
  y: 0.0
  z: 0.0
orientation:
  x: 0.0
  y: 0.0
  z: 0.0
  w: 0.0

In [63]: pose_target_2.position.x = 0.1
In [64]: pose_target_2.position.y = -0.1
In [65]: pose_target_2.position.z = 0.2
In [66]: pose_target_2.orientation.y = -1.0

In [68]: print( pose_target_2 )
position:
  x: 0.1
  y: -0.1
  z: 0.2
orientation:
  x: 0.0
  y: -1.0
  z: 0.0
  w: 0.0

In [69]: group.set_pose_target( pose_target_2 )
In [70]: group.go()
Out[70]: True
set_pose_target() に渡せるもう1つの型 PoseStamped 型については
- 発展的なロボットプログラミング - より複雑なロボット動作計画 / 姿勢の参照座標を指定する
にて説明します.
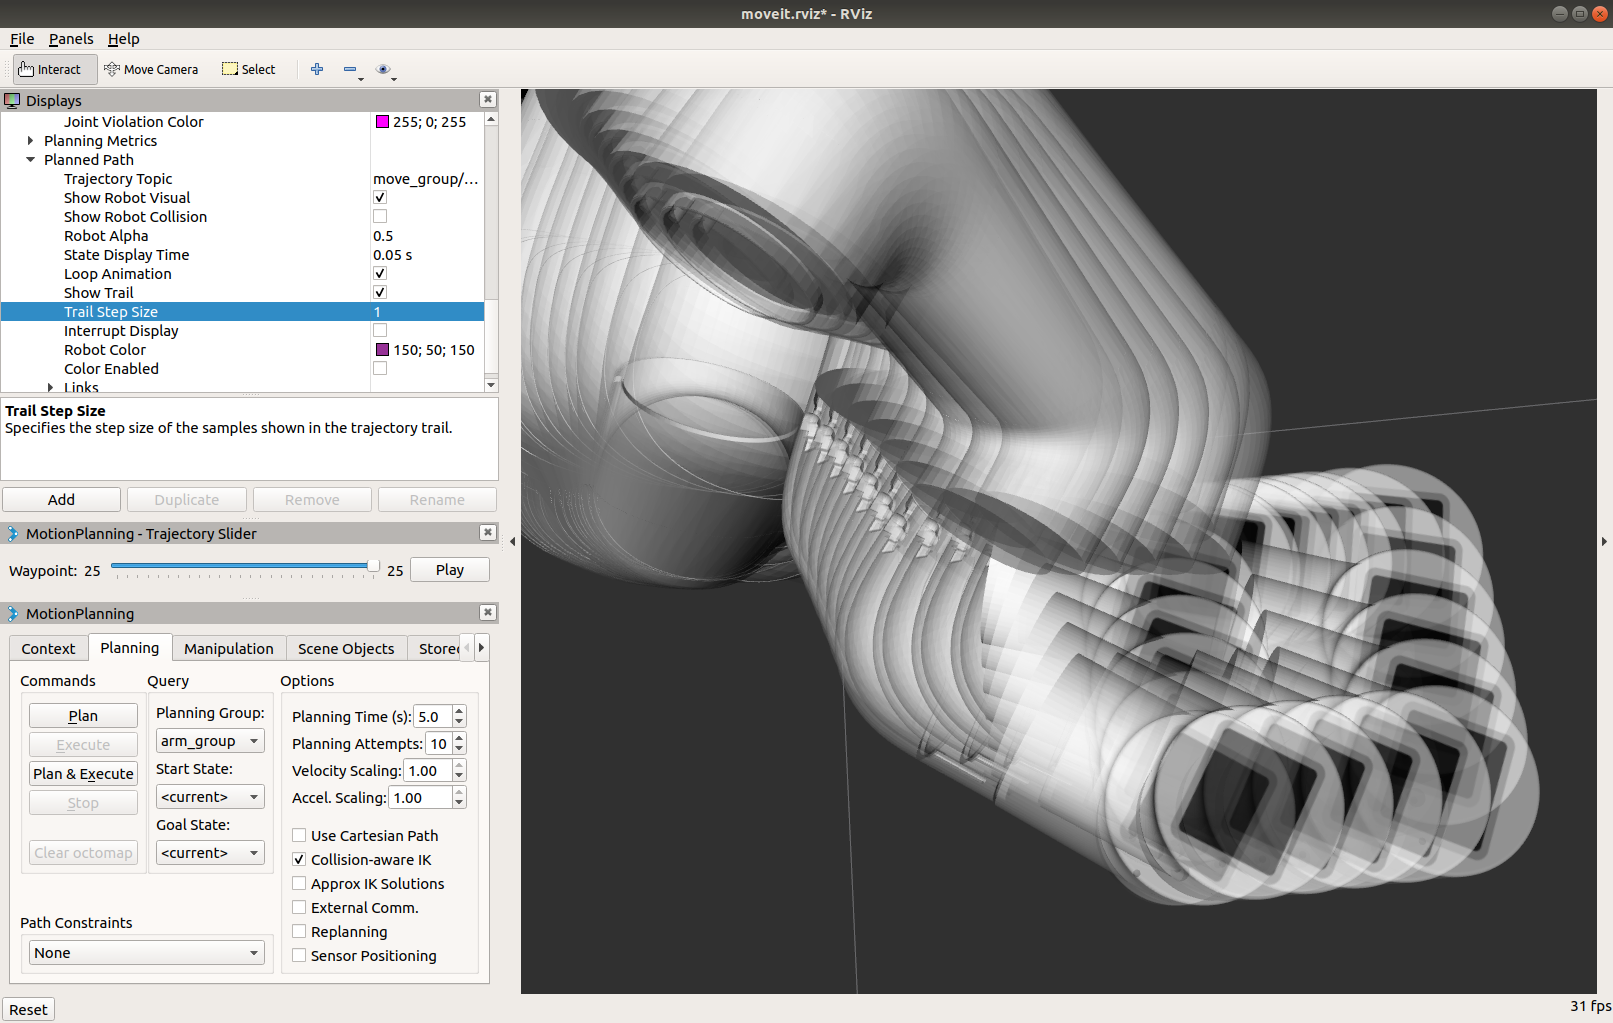
1.1.7. 直線補間軌道でロボットを動かす
group.plan() や group.go() を用いた動作計画では動作開始姿勢と目標姿勢の間の動作は
各関節の開始角度と目標角度の間を補間した動作として計画されます.
このことは開始姿勢や目標姿勢として指定した姿勢以外の動作途中におけるエンドエフェクタの姿勢は
保証されないことを意味します.
エンドエフェクタを目標姿勢間で直線的に動作させたい場合は
group.compute_cartesian_path() を用いて動作計画をします.
compute_cartesian_path() はその名前のとおり,
直行座標(=デカルト座標: Cartesian Coordinates)における補間軌道(Path)を作成します.
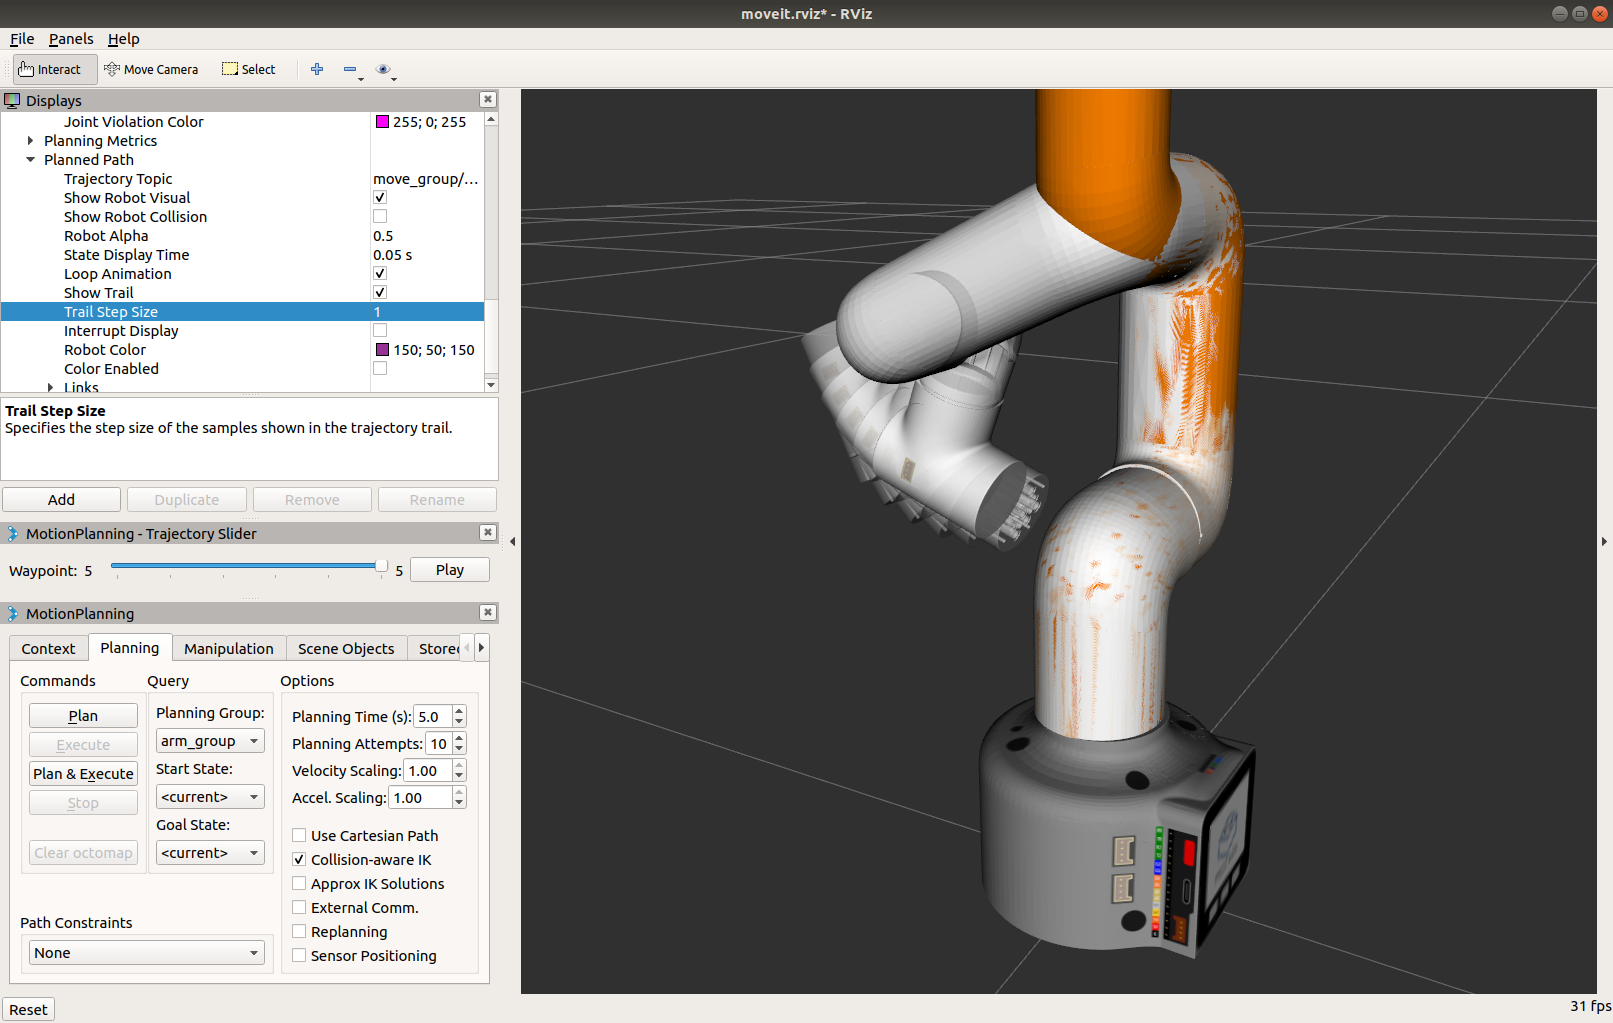
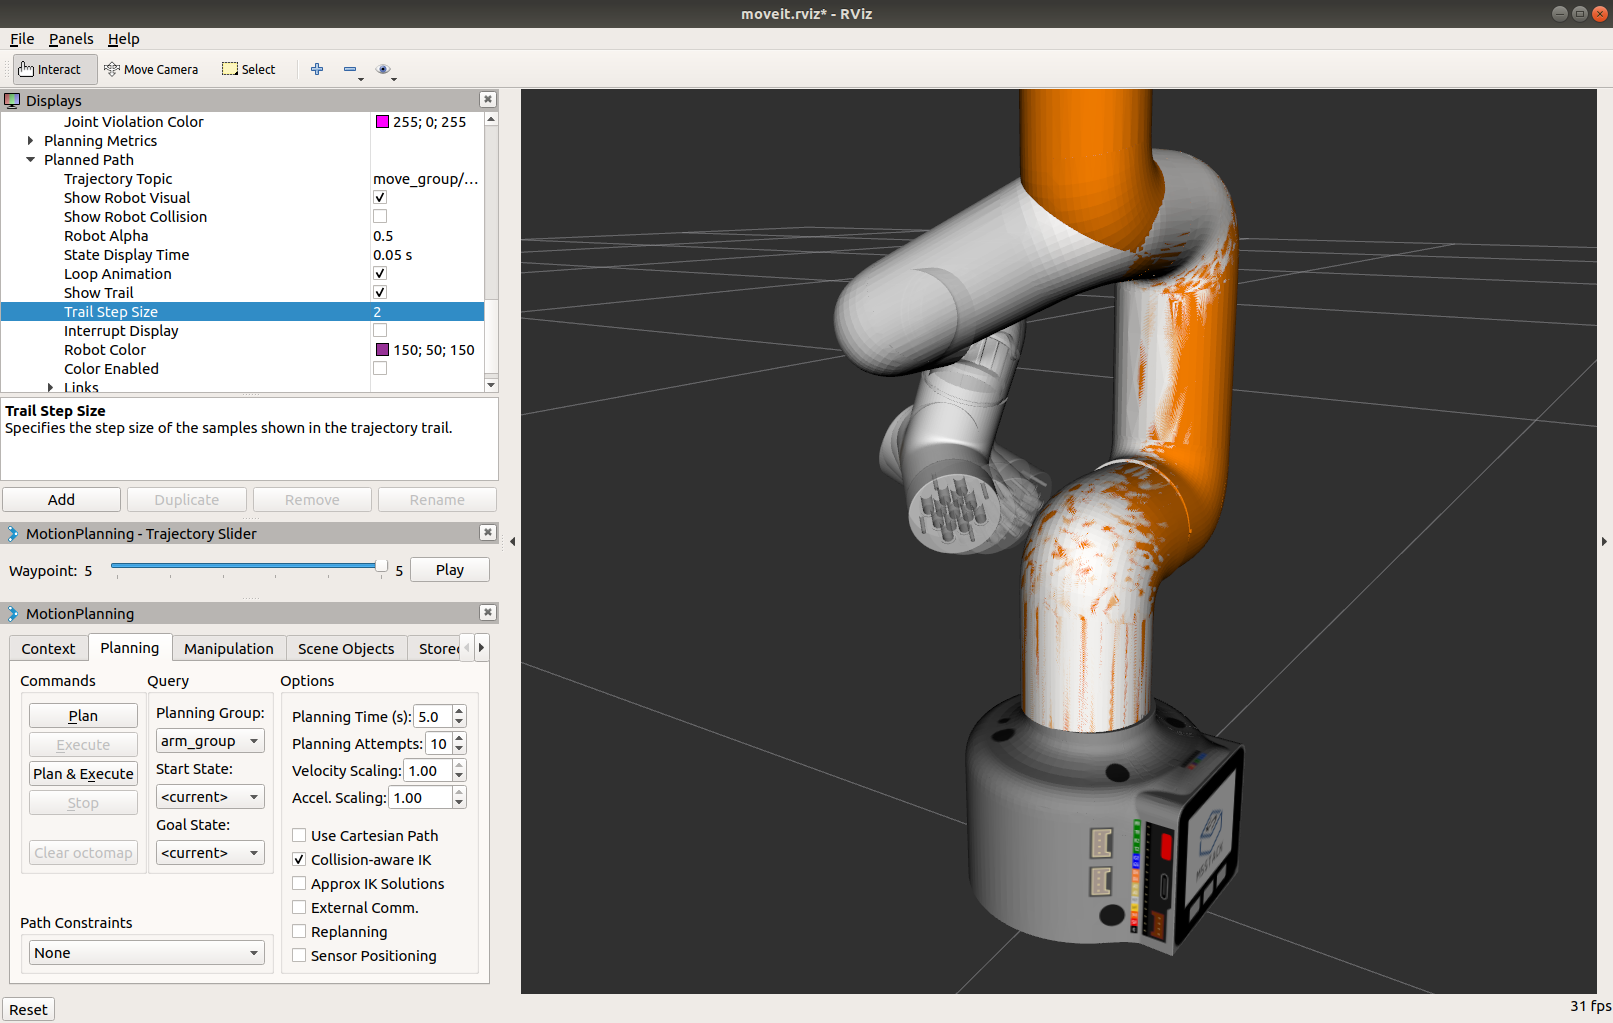
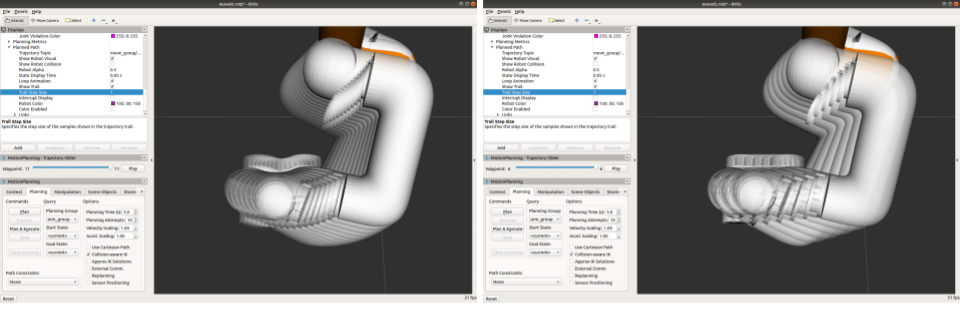
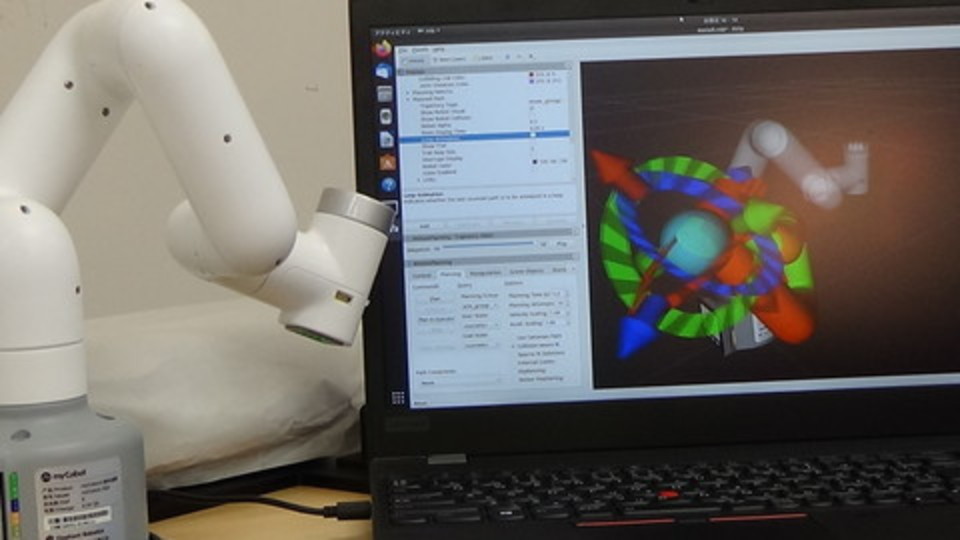
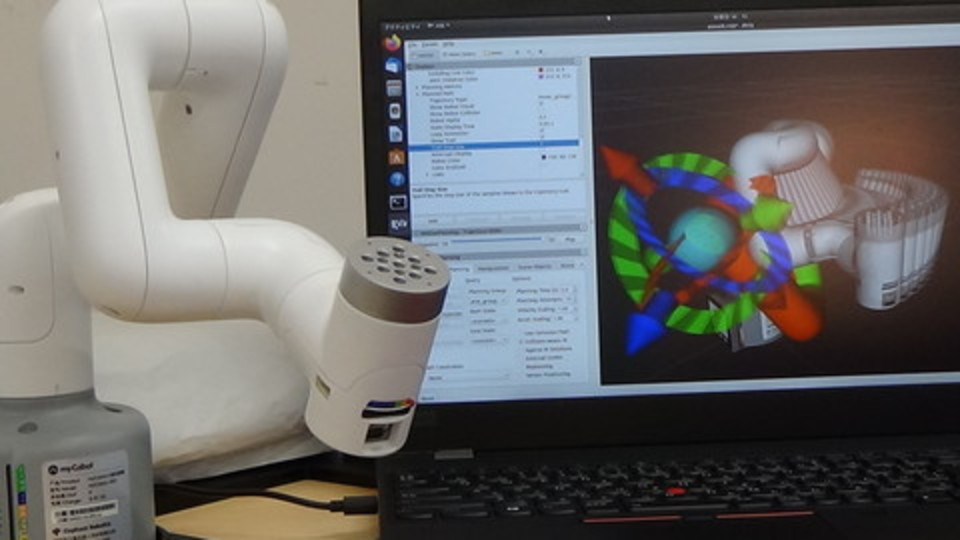
group.plan() や group.go() で作成された動作計画(画像:左)と
group.compute_cartesian_path() で作成された動作計画(画像:右)を比較すると
次のようになります.
compute_cartesian_path() の具体的な使用方法は本項に続く項目の
- 連続した指令をロボットに送る
- 四角形や円に沿ってエンドエフェクタを動かす
を通して学習します.
1.1.8. 連続した指令をロボットに送る
ロボットの複数の異なる姿勢を指示して動作計画と実行を行います.
複数の姿勢を指定した動作計画を行う場合も直線補間軌道でロボットを動かす場合と同じ
compute_cartesian_path() を用います.
compute_cartesian_path( self, waypoints, eef_step, jump_threshold, avoid_collisions = True )
には次のものを渡します.
waypoints: エンドエフェクタが経由する姿勢のリストeef_step: エンドエフェクタの姿勢を計算する間隔の距離jump_threshold: 軌道内の連続する点間の最大距離(0.0で無効)avoid_collisions: 干渉と運動学上の制約チェック(デフォルトはTrueでチェックする)
本チュートリアル手順に則って進めている場合,
myCobot 用の複数の姿勢のリスト waypoints_mycobot が用意されているので内容を確かめてみます.
In [2]: print( waypoints_mycobot )
[position:
  x: 0.1
  y: -0.1
  z: 0.1
orientation:
  x: 0.0
  y: -0.707
  z: 0.0
  w: 0.707, position:
  x: 0.1
  y: -0.15
  z: 0.1
orientation:
  x: 0.0
  y: -0.707
  z: 0.0
  w: 0.707, position:
  x: 0.1
  y: -0.1
  z: 0.2
orientation:
  x: 0.0
  y: -1.0
  z: 0.0
  w: 0.0, position:
  x: 0.1
  y: -0.2
  z: 0.2
orientation:
  x: 0.0
  y: -1.0
  z: 0.0
  w: 0.0]
myCobot を特異姿勢でない姿勢にしてから,
姿勢のリスト waypoints_mycobot を compute_cartesian_path() に渡して動作計画を作成します.
In [3]: group.set_joint_value_target([0, 0, -1.57, 0, 0, 0])

In [4]: group.go()
Out[4]: True

In [5]: ( plan, fraction ) = group.compute_cartesian_path( waypoints_mycobot, 0.01, 0.0)
compute_cartesian_path() で得られた計画 plan を
group.execute() に渡してロボットで動作を実行します.
In [6]: group.execute(plan)
Out[6]: True
1.1.9. 四角形や円に沿ってエンドエフェクタを動かす
エンドエフェクタを四角形や円に沿って動かすような場合も 複数の異なる姿勢を指示して動作計画と実行を行います.
四角形や円に沿った複数の姿勢のリストをそれぞれ
waypoints_rectangular と waypoints_circular として
用意しているのでそれらを使います.
In [10]: print( waypoints_mycobot_rectangular )
[position:
  x: 0.1
  y: 0.1
  z: 0.1
orientation:
  x: 0.0
  y: -1.0
  z: 0.0
  w: 6.123233995736766e-17, position:
  x: 0.1
  y: 0.15
  z: 0.1
orientation:
  x: 0.0
  y: -1.0
  z: 0.0
  w: 6.123233995736766e-17, position:
  x: 0.15
  y: 0.15
  z: 0.1
orientation:
  x: 0.0
  y: -1.0
  z: 0.0
  w: 6.123233995736766e-17, position:
  x: 0.15
  y: 0.1
  z: 0.1
orientation:
  x: 0.0
  y: -1.0
  z: 0.0
  w: 6.123233995736766e-17, position:
  x: 0.1
  y: 0.1
  z: 0.1
orientation:
  x: 0.0
  y: -1.0
  z: 0.0
  w: 6.123233995736766e-17]

In [11]: group.set_joint_value_target( [ 0.0, 0.0, -1.57, 0.0, 0.0, 0.0 ] )

In [12]: group.go()
Out[12]: True

In [13]: ( plan, fraction ) = group.compute_cartesian_path( waypoints_mycobot_rectangular, 0.01, 0.0)

In [14]: group.execute(plan)
Out[14]: True
同様に円に沿った動作を行います.
In [13]: ( plan, fraction ) = group.compute_cartesian_path( waypoints_mycobot_circular, 0.01, 0.0)

In [14]: group.execute(plan)
Out[14]: True
exit もしくは quit で終了します.
In [15]: exit
2. プログラムファイルを実行する
コンソールでのプログラム実行は学習や各コマンドの動作確認には良いのですが, 毎回同じことを入力して実行するのは大変なので命令が書かれたプログラムファイルを実行します.
プログラムファイルを実行する前に物理シミュレータと MoveIt! を起動しておきます.
2.1. myCobot の場合
ターミナル-1
$ source ~/catkin_ws/devel/setup.bash
$ roslaunch tork_moveit_tutorial demo.launch
動作プログラムファイルを実行します.
ターミナル-2
$ source ~/catkin_ws/devel/setup.bash
$ rosrun tork_moveit_tutorial mycobot_moveit_tutorial_poses.py
実機を動かす場合
先に「実機の使い方 - myCobot の場合」を参照してください.
そのあと,上に書かれたコマンドの代わりに, 以下を実行してください.
ターミナル-1 : myCobot 280 とパソコンの接続プログラムの起動
$ source ~/catkin_ws/devel/setup.bash
$ roslaunch tork_moveit_tutorial mycobot_interface.launch
ターミナル-2 : myCobot 280 用の MoveIt! の起動
$ source ~/catkin_ws/devel/setup.bash
$ roslaunch tork_moveit_tutorial demo.launch mode:=real
ターミナル-3
$ source ~/catkin_ws/devel/setup.bash
$ rosrun tork_moveit_tutorial mycobot_moveit_tutorial_poses.py
set_pose_target を用いて手先位置姿勢を指定し,腕を動かすプログラムの例が以下になります.
mycobot_moveit_tutorial_poses.py
#!/usr/bin/env python

from tork_moveit_tutorial import *
from tf.transformations import quaternion_from_euler

if __name__ == '__main__':

    init_node()

    group = MoveGroupCommander("arm_group")
    # Pose Target 1
    rospy.loginfo( "Start Pose Target 1")
    pose_target_1 = Pose()

    # quaternion_from_euler(0, 0, -1.57079)
    pose_target_1.position.x = 0.2
    pose_target_1.position.y = 0.0
    pose_target_1.position.z = 0.2
    pose_target_1.orientation.x = 0.0
    pose_target_1.orientation.y = 0.0
    pose_target_1.orientation.z = -0.7071
    pose_target_1.orientation.w =  0.7071

    rospy.loginfo( "Set Target to Pose:\n{}".format( pose_target_1 ) )
    group.set_pose_target( pose_target_1 )
    group.go()

    # Pose Target 2
    rospy.loginfo( "Start Pose Target 2")
    pose_target_2 = Pose()

    pose_target_2.position.x = 0.0
    pose_target_2.position.y =-0.2
    pose_target_2.position.z = 0.2
    pose_target_2.orientation.z = -0.7071
    pose_target_2.orientation.w =  0.7071

    rospy.loginfo( "Set Target to Pose:\n{}".format( pose_target_2 ) )
    group.set_pose_target( pose_target_2 )
    group.go()

    # Compute Cartesian path
    (plan, fraction) = group.compute_cartesian_path([pose_target_1, pose_target_2], 0.01, 0.0)
    group.execute( plan )
他のロボットの動作計画・動作の実行ファイルとの相違点は次のとおりです.
group = MoveGroupCommander()に渡すグループ名を"arm_group"に変更- ターゲットポーズの位置・姿勢を myCobot の機構に適したものに変更
Pose() に指定する姿勢情報のクオータニオン情報は,
from tf.transformations import quaternion_from_euler
で得られる,quaternion_from_euler(0, 0, -1.57079) 関数を用いて取得します.
また,このプログラムに続けて
以下のように,pose_target_1, pose_target_2を用いて
group.compute_cartesian_path([pose_target_1, pose_target_2], 0.01, 0.0)
として直線補間軌道を計画し,group.execute( plan ) で実行します.
    # Compute Cartesian path
    (plan, fraction) = group.compute_cartesian_path([pose_target_1, pose_target_2], 0.01, 0.0)
    group.execute( plan )
2.2. ROS や MoveIt! のメリット
KHI duAro を例にとり,ロボット制御をプログラムから行う方法に ついて見てきましたが,動作計画・動作プログラムにおいて, ほかのロボットとの相違点はほとんどありません. ロボットが代わった場合に変更すべき部分は,下記の2ヶ所程度であり, ロボットが変わっても,プログラム方法はほとんど変わらないので, 様々なメーカーのロボットをこれらの知識で制御することができます.
- group = MoveGroupCommander() に渡すグループ名を各ロボットアームに対応したものにする
- ターゲットポーズの位置・姿勢を各ロボットの機構に適したものにする
このように「ロボットが異なっても基本的には同じプログラムが動く」ということが ROS や MoveIt! のインタフェースを使用する最大のメリットの1つであるといえます.